How to Use DM Automation
Scale your personal touch with Smart Automation. While Vardast offers an AI Admin for human-like conversation, lead generation, and registering orders, Smart Automation is your tool for delivering a high-impact, curated experience the moment your audience asks for it.
This feature allows you to showcase your brand's best assets by instantly delivering voice notes, videos, product vitrines, and interactive buttons based on specific triggers. It ensures that every inquiry is met with a professional, media-rich presentation that guides users toward a purchase, giving you total control over the customer journey without the need for manual repetition.
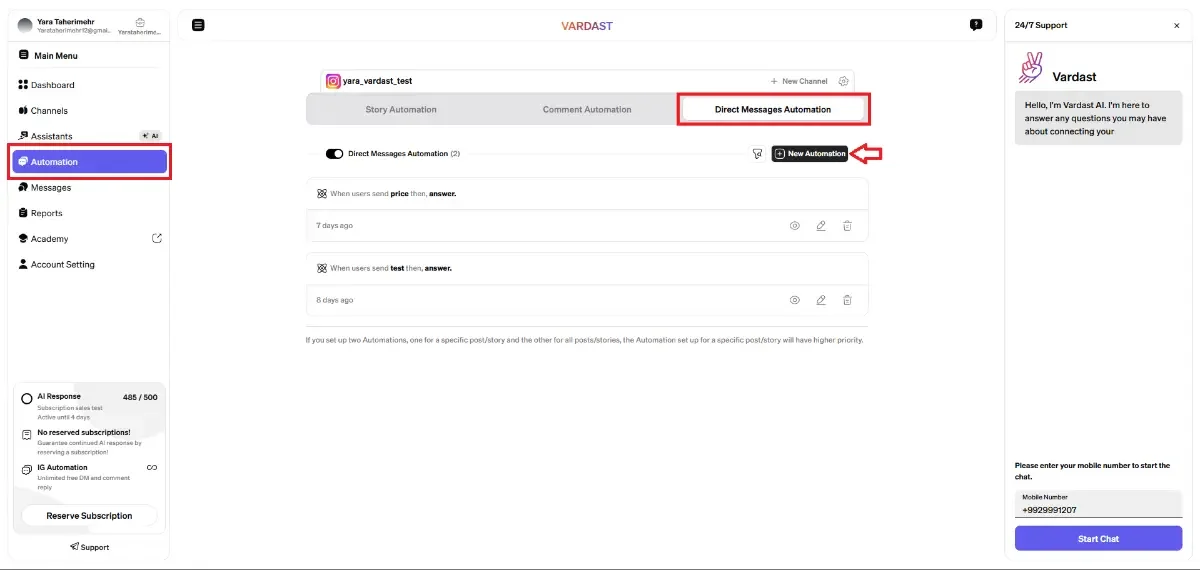
Step 1: Open the Automation Builder
To begin, navigate to the Automation tab in your sidebar and select the Direct Messages Automation category. Click the + New Automation button to open the setup editor.
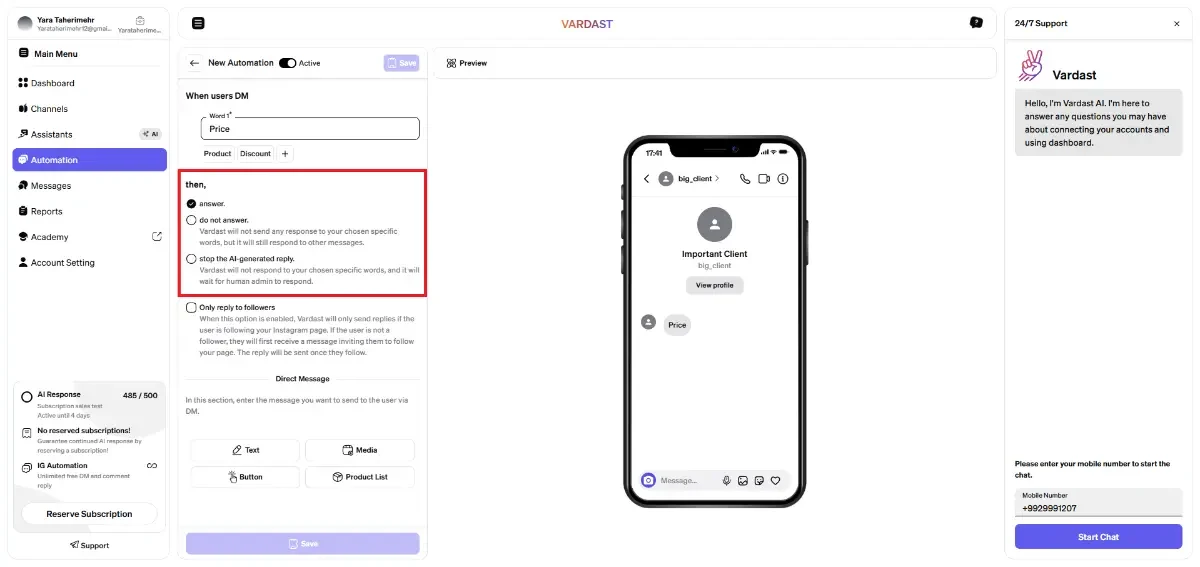
Step 2: Define Your Triggers
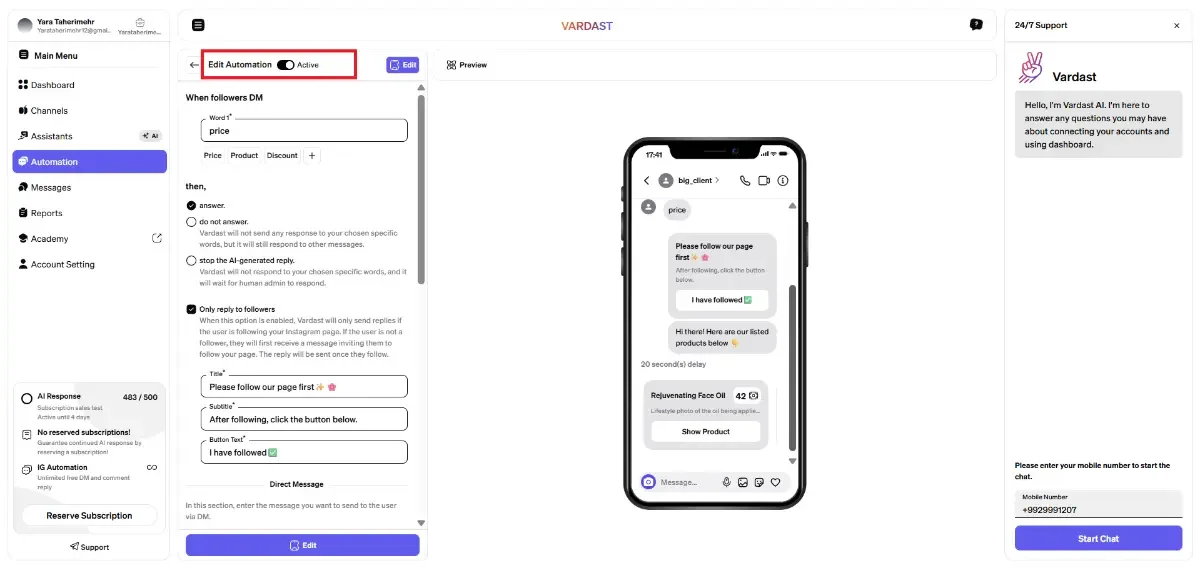
Under the "When users DM" section, establish the keywords that activate your flow:
- Word Input: Type your primary keyword in the "Word 1" box.
- Add Variations: Use the + button to add similar words like "Price," "Product," or "Discount" to ensure the automation catches different user inquiries.

Step 3: Choose the Answering Logic
Decide how the system should react when these keywords are detected:
- answer: Select this to send your custom automated response.
- do not answer: Choose this if you want the system to ignore specific words while still responding to others.
- stop the AI-generated reply: This pauses the Vardast AI for these specific words, allowing a human admin to take over the conversation.
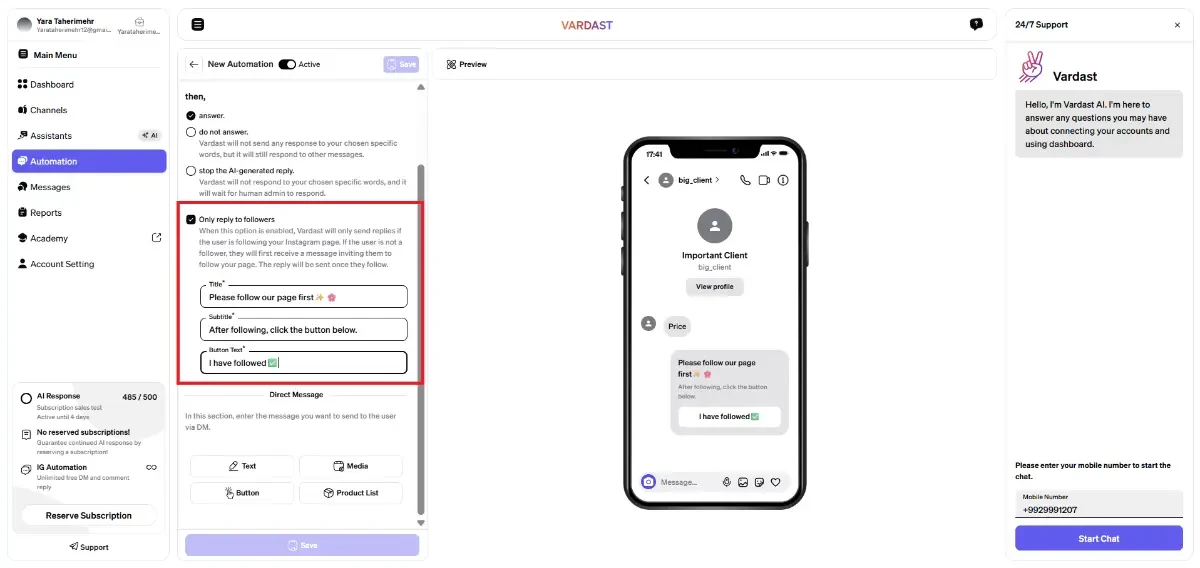
Step 4: Configure Follower Conditions
This feature allows you to prioritize your community and grow your following:
- Enable "Only reply to followers": When active, Vardast checks the user's status before sending your automation.
- Followers: They receive your automated reply immediately.
- Non-Followers: They receive an automated invitation to follow your page first. Your reply will be sent automatically as soon as they hit the Follow button.
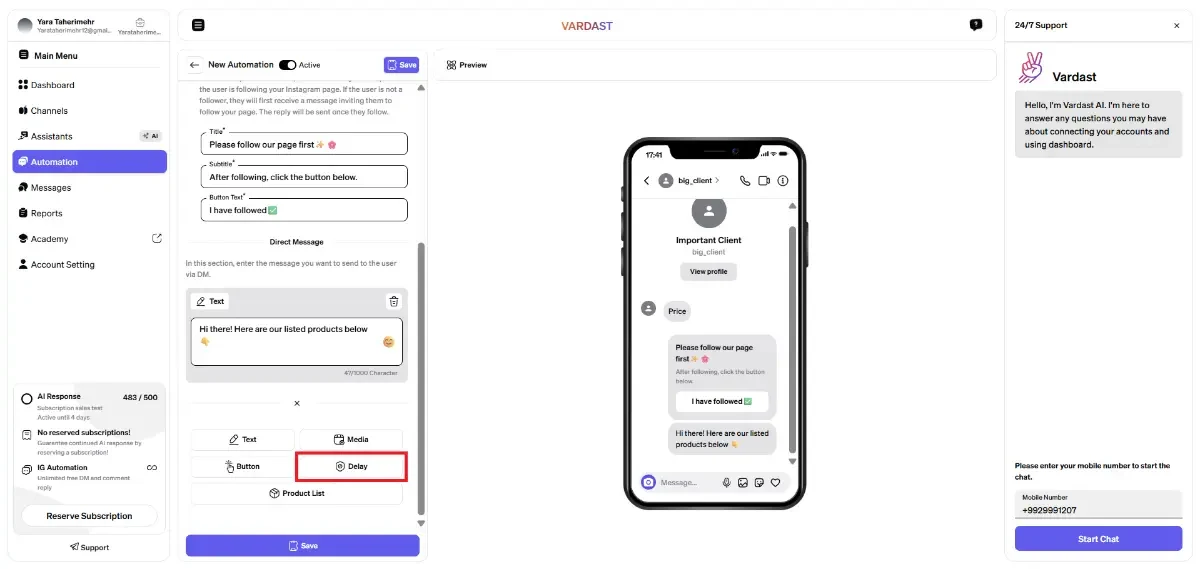
Step 5: Design Your Response Content
In the Direct Message section, use the interactive blocks to build your sequence:
- Text: Send standard text messages to greet or inform your users.
- Media: Attach high-quality images, voice notes, or videos to create a more engaging response.
- Button: Add clickable options to guide the user to specific links or further steps.
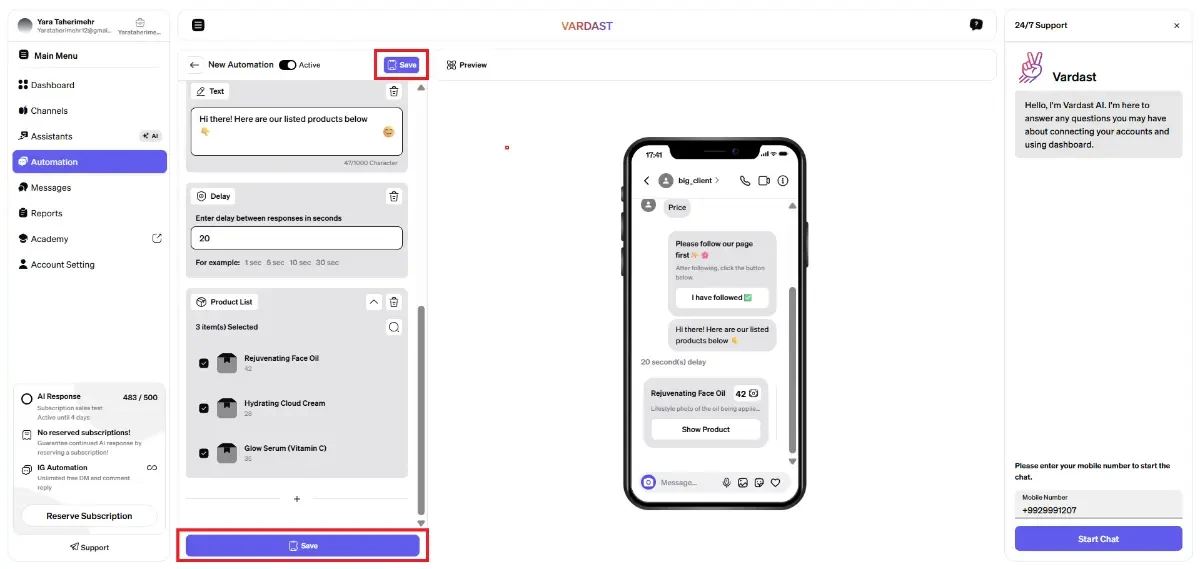
- Product List: Insert your product vitrine to showcase your catalog directly in the chat.
- Add New Steps: By clicking on the + icon between or after blocks, you can stack multiple elements to create a more detailed flow.
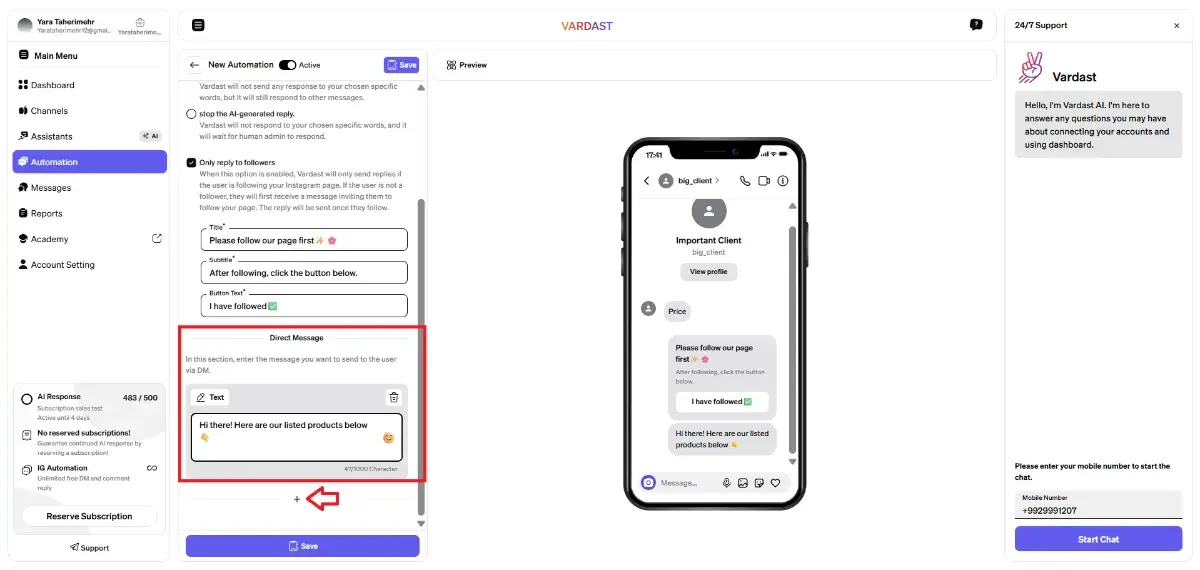
- Delay Option: Between any two blocks, you can insert a Delay (up to 10 minutes) to make the interaction feel more natural and give the user time to read.
Step 6: Preview and Save
View your creation in real-time using the Preview mobile mockup on the right. Once satisfied, ensure the Active toggle is on and click Save to launch your automation.
- On/Off Toggle: Use the switch in the upper corner to instantly pause your automation. When you're ready to start again, simply toggle it back on to resume your settings exactly where you left them.
Managing and Monitoring Your Flows
Control Icons
At the bottom of each automation card, you will find these essential tools:
- Eye Icon (Preview): View exactly how the message looks in a Direct Message.
- Pencil Icon (Edit): Update your triggers or change your content blocks.
- Trash Icon (Delete): Remove the automation entirely.

- On/Off Toggle: If you need to stop your automation entirely, turn off the "Direct Automation" toggle. To reactivate them later, simply switch the toggle back on to resume your settings.
