Getting Started With Smart Automation
Overview
This guide walks you through building a multi-step automation sequence. You will learn how to define triggers, apply follower logic, and branch conversations based on user intent.
Prerequisites:
- An active Vardast account.
- Connected Instagram Business or Creator profile to Vardast.
- (Optional) Products pre-loaded into your Vardast Catalog for the Vitrine block.
Step 1: Define the Interaction (Trigger)
Every automation begins with a specific user action. Navigate to Smart Automation and select the interaction type:
- Direct Message: Triggered by specific keywords in DMs.
- Story Reply: Triggered when a user interacts with your Stories.
- Comment Reply: Triggered by comments on your posts.
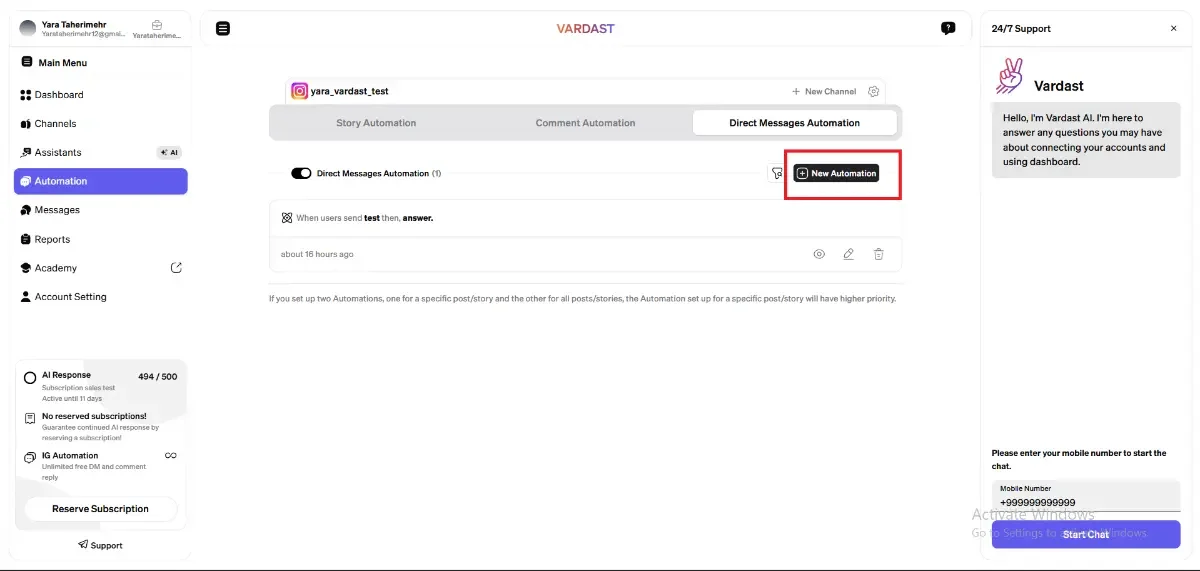
Step 2: Define Logic and Follower Condition
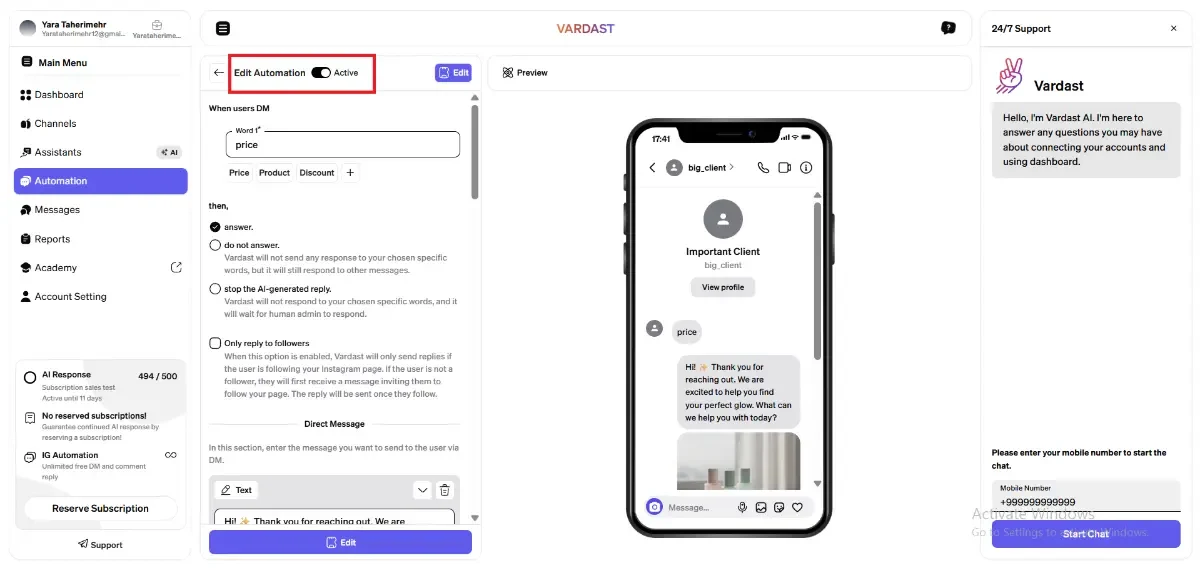
Click on New Automation.
Define Trigger: Enter your primary keyword (e.g., "Price"). Use the + icon to add variations like "Cost" or "Info".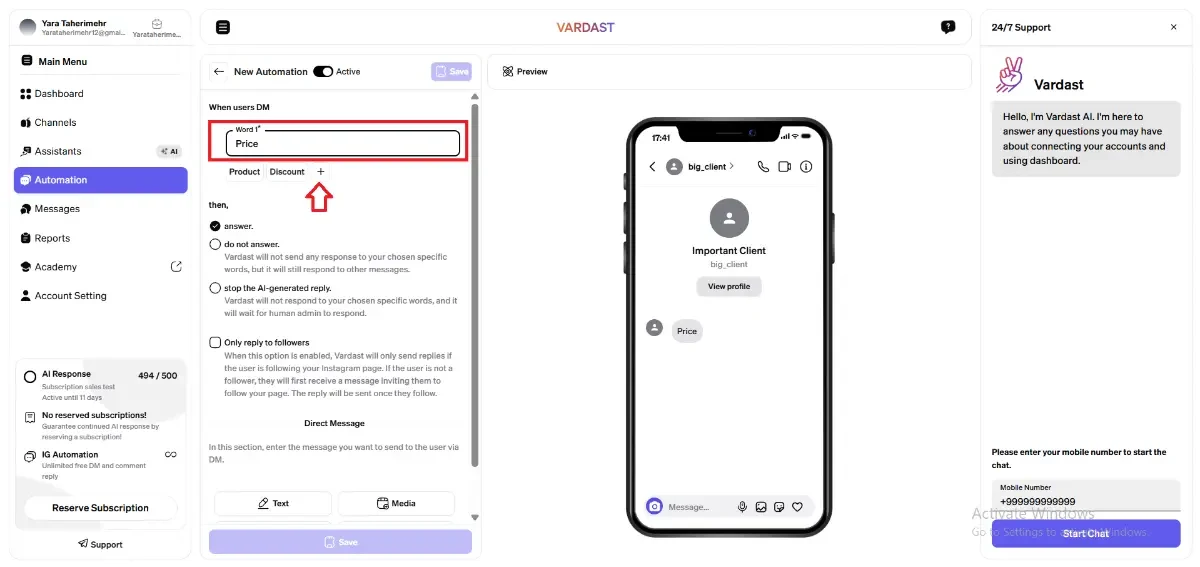
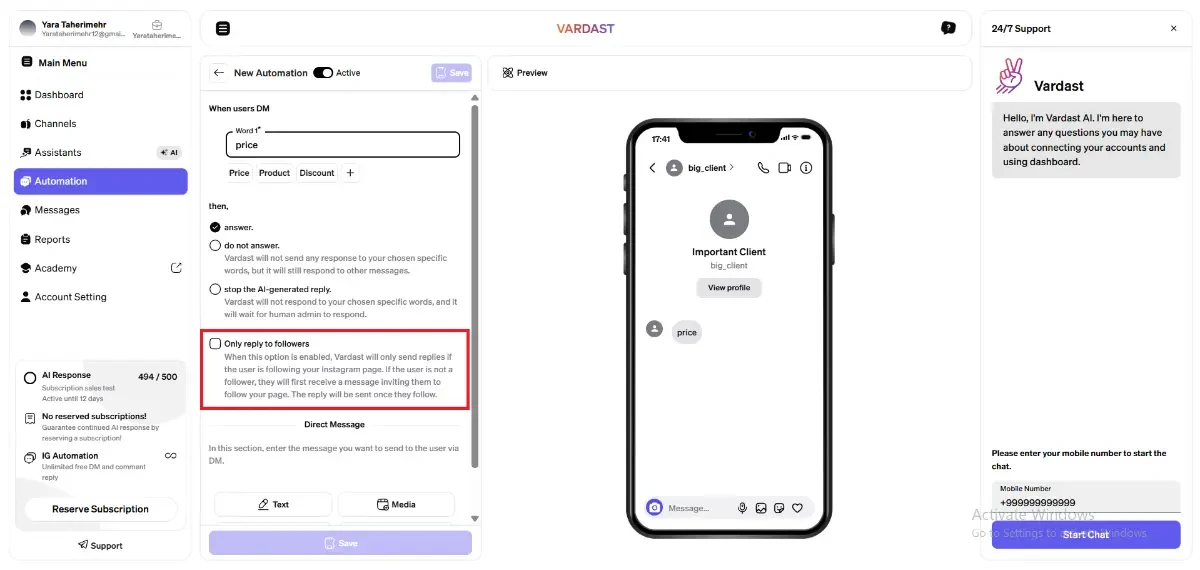
- Follower Condition: Toggle the "Only reply to followers" switch to ON. This ensures the automation only proceeds if the user follows your account, incentivizing audience growth.
Step 3: Configure Content Blocks
Using a Skincare Brand as an example, here is how to layer your content using the Media block:
1. The Welcome (Text Block)
Choose Text as your first step.
Tip: You can use the Vardast widget on the left to edit your text message.
Example: "Hi! ✨ Thank you for reaching out. We are excited to help you find your perfect glow. What can we help you with today?"
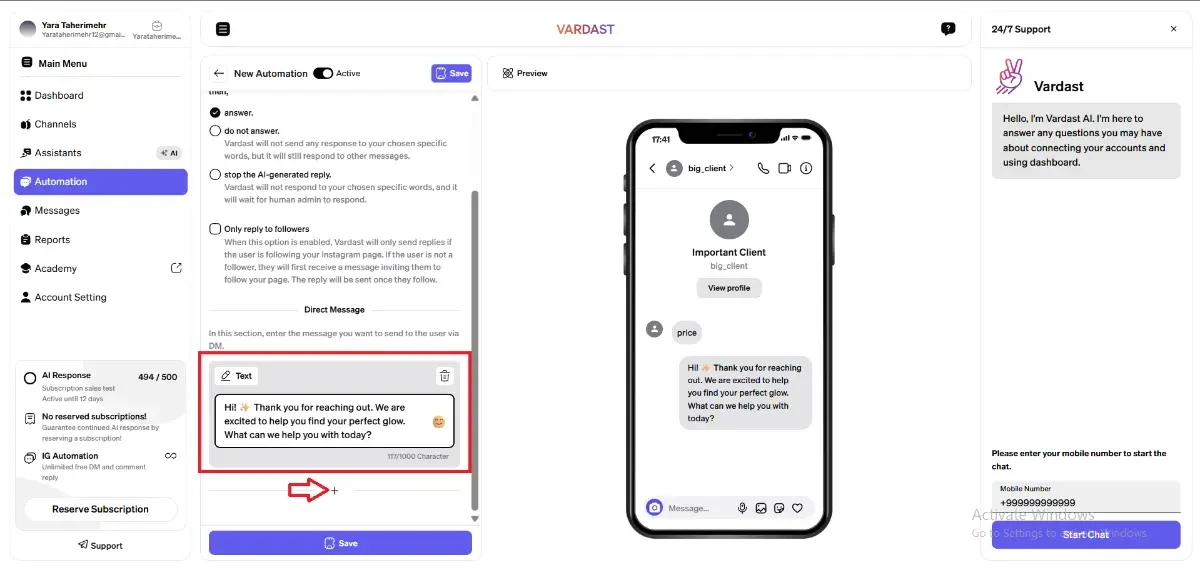
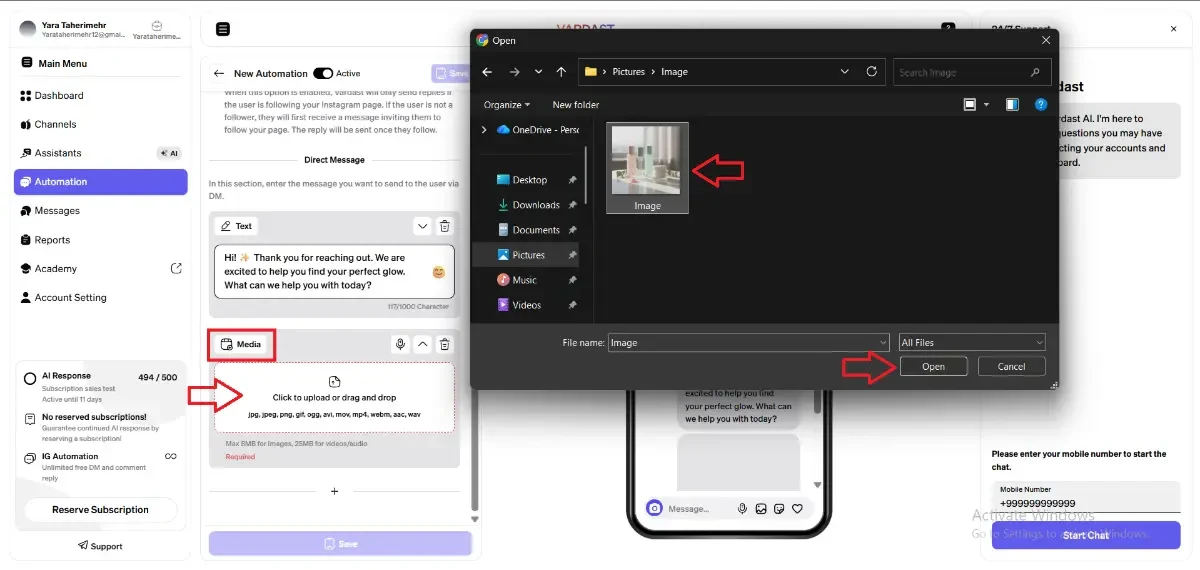
2. The Visual (Media Block - Image)
Click + to add a step and choose Media.
- Supported Formats: JPG, JPEG, PNG, GIF.
- Size Limit: Max 8 MB for images.
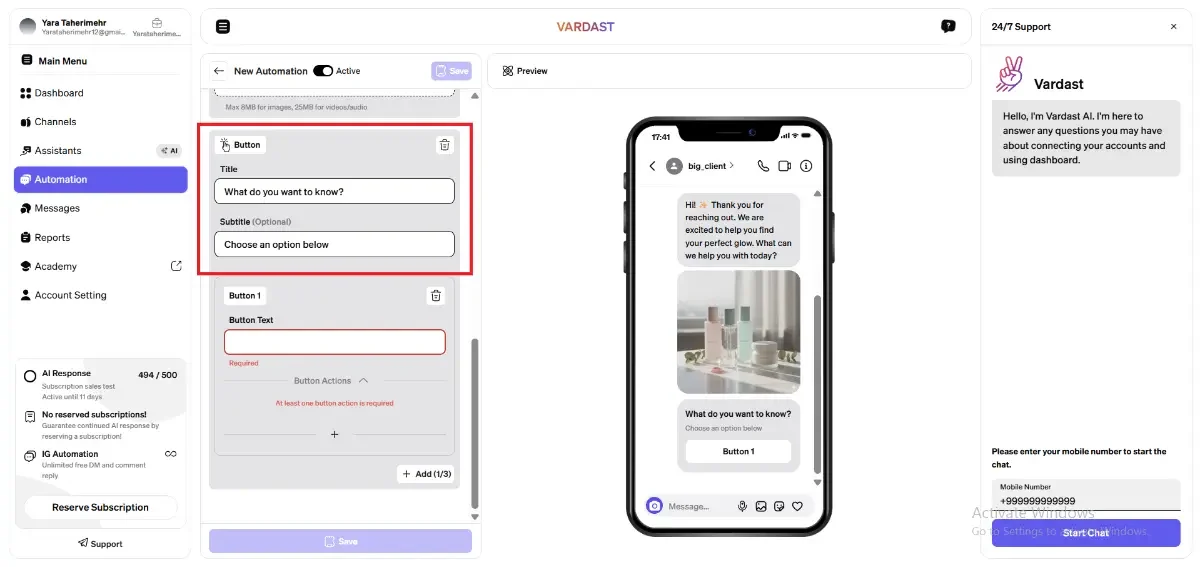
3. Configuring Action Buttons
The Buttons block allows you to segment your audience based on their interests.
- Button Capacity: You can create up to three buttons per block.
- Customization: * Title (Required): The primary text (e.g., "What do you want to know?").
- Subtitle (Optional): Additional context (e.g., "Choose an option below").
- How to Expand: By clicking on the "+ Add" command, you can initialize and create new buttons within the block.
Step 4. Defining Actions and Branching Logic
After initializing your buttons, you must define the specific path each one will trigger. Vardast allows you to build sophisticated, multi-step sequential flows within a single button branch.
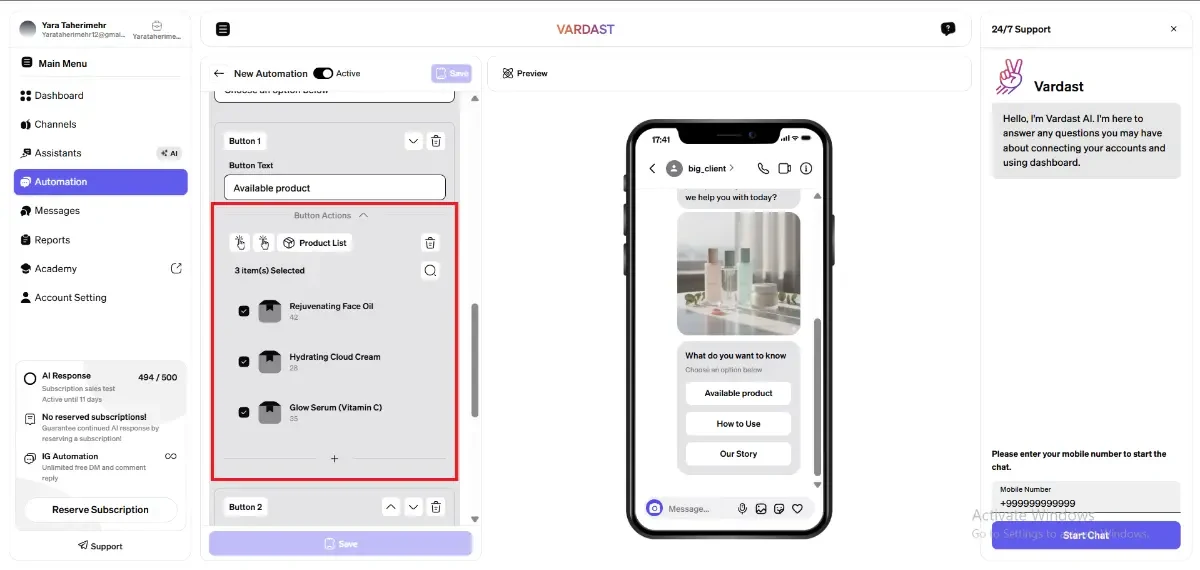
- Assigning Actions: Click the "+" icon attached to an individual button to create its specific action.
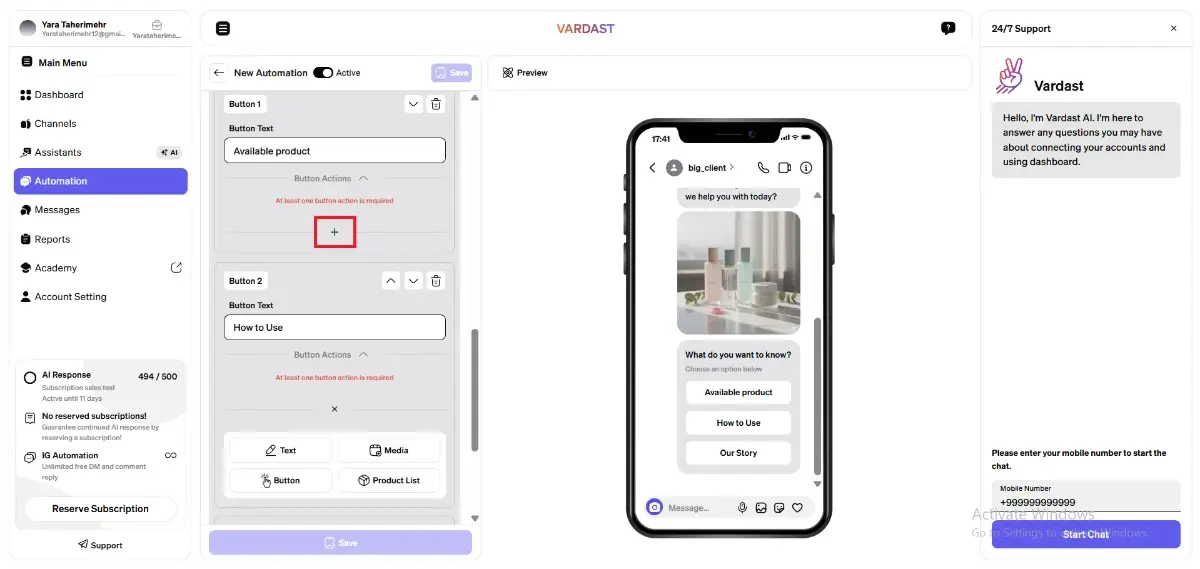
- "Available product" Button → Product Vitrine: You can select specific products to showcase from your Vardast Catalog. This allows users to view visuals and prices directly in the DM.
- For more info on how to add your products.
- "How to Use" Button → Video Tutorial: Click on media first then upload a video (MP4, MOV, AVI, WEBM) providing a 30-second tutorial on skin application.
- Limit: Max 25 MB.
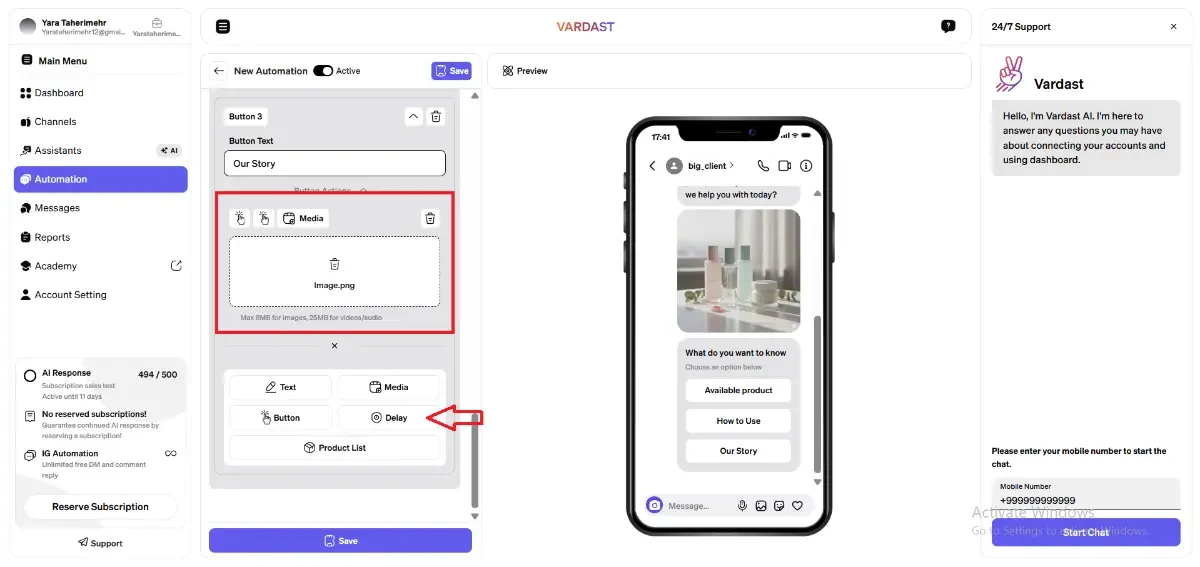
- "Our Story" Button → Media (Image) → Smart Delay → Voice Note:
- Step 1: Media (Image): Deliver a high-quality brand or founder image to set the context (Max 8 MB), then click the "+" icon to select Delay
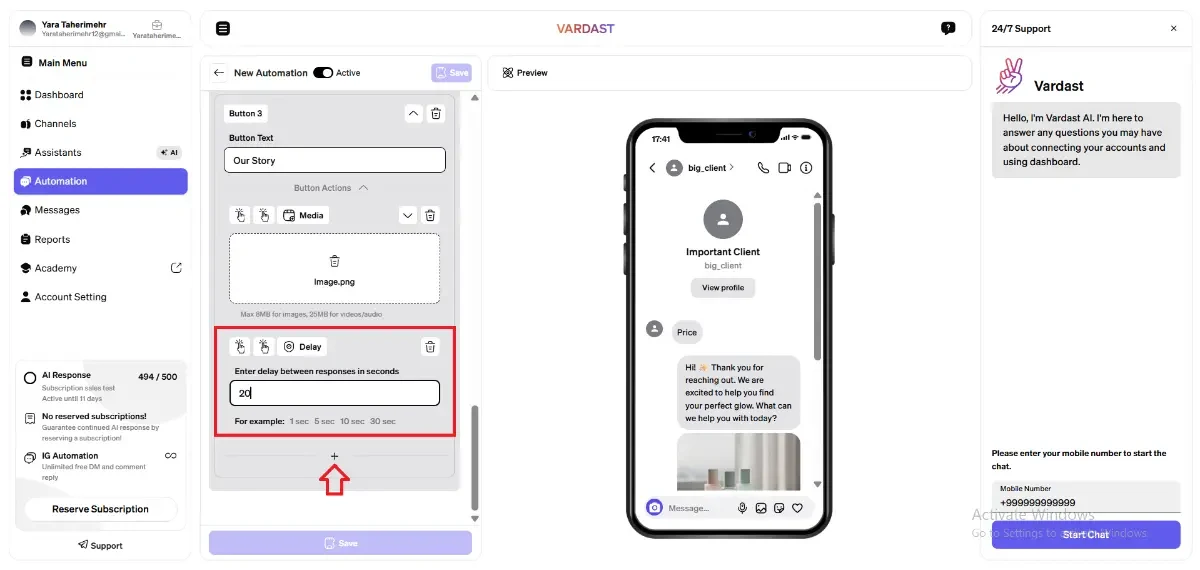
- Step 2: Smart Delay: Incorporate a strategic pause to allow the user time to view the image before the audio arrives. For instance, you can set a 20-second delay, then click the "+" icon to create your final step.
- Limit: Max 10 minutes.
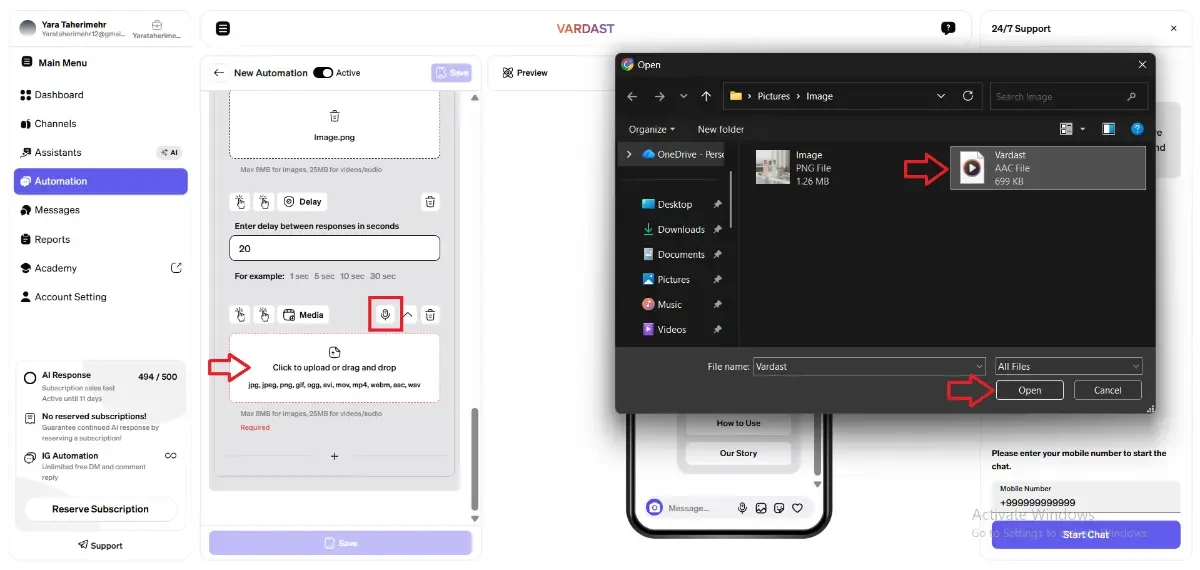
- Step 3: Voice Note: Send a personal audio message sharing the brand mission. Record directly via the Voice Icon or upload an audio file (MP3, WAV, AAC, OGG).
- Limit: Max 25 MB.
Publishing
Once your logic and content are finalized, click the "Save" button at the top and your automation will begin monitoring interactions immediately.
Automation Management & Tools
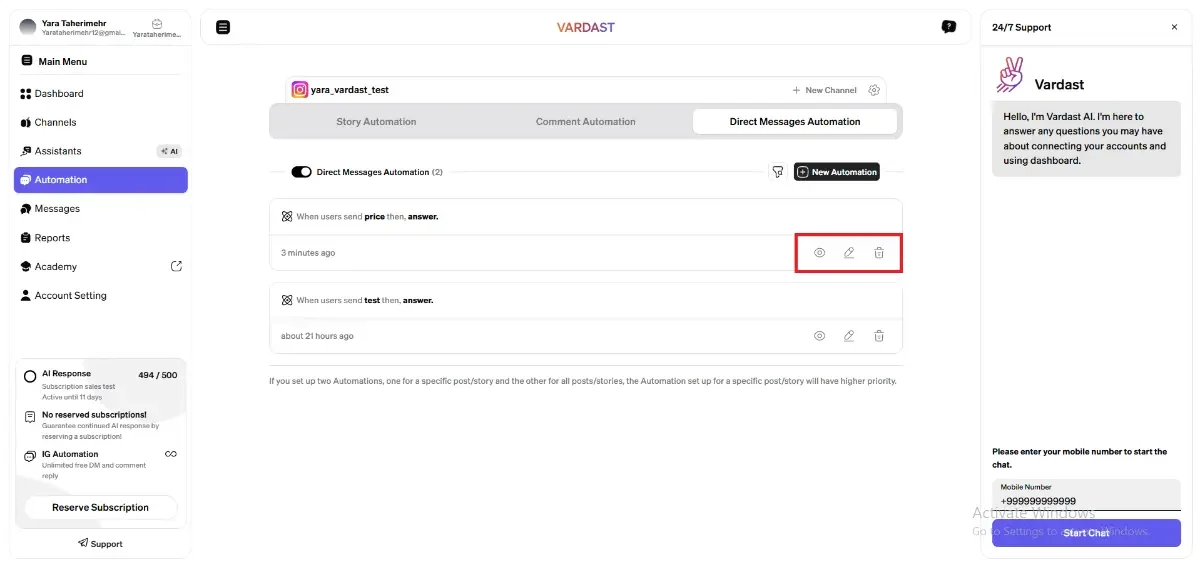
Vardast provides several intuitive icons within the dashboard to help you manage and refine your flows:
- Global Control: The button located on the upper side of the All Interaction Points section allows you to turn OFF or back ON all of your automations simultaneously.
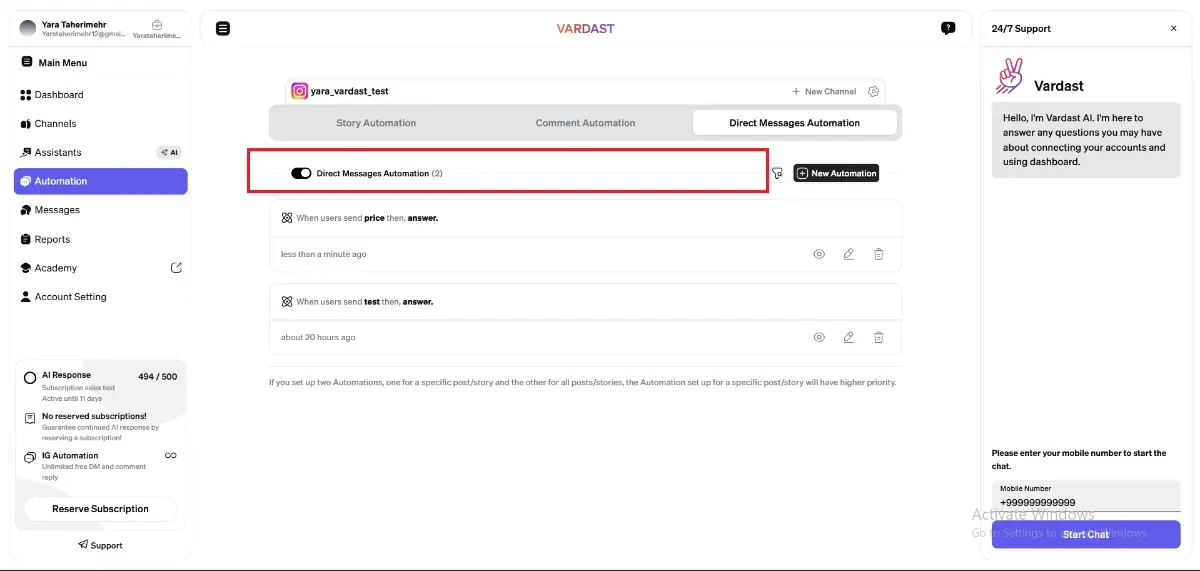
- Status Toggle: By switching the toggle in the upper corner of an individual automation to OFF, that specific flow will remain inactive until it is manually reactivated.
 Preview (Eye Icon): Click the Eye Icon to see a real-time preview of your flow. A Full Preview remains visible on the screen during the creation process to help you visualize the user experience.
- Edit (Pencil Icon): Click the Pencil Icon to modify and edit the logic or content of an existing automation.
- Delete (Cycle bin Icon): Use the Cycle bin Icon to permanently remove an automation from your dashboard.